Thursday, December 6, 2012

Tree cutting

Yeah, so I made it a whopping three weeks before my blog schedule got thrown out the window.  I am not one for excuses, so I won't make any.  But I will promise to try and make this a little more of a priority in the future. Once I got off track it was pretty easy to let it keep sliding....Oops!

I hope you all had a fabulous Thanksgiving!  We sure did!  We headed down to visit my in-laws down in Durango.  There was wonderful company, amazing food and a chance to get our family portraits done by EllaBelle Photography!  I will share them when I get them!

Since then we have battled the stomach flu, cut down and decorated our Christmas Tree, welcomed our resident scout elf, Josie, and been getting into the holiday spirit big time!

Since my blog schedule is pretty well shot, I will not follow it for this week (but will pick it back up next week).  Instead I will leave you with this picture from our tree cutting adventure.

We went down to Pikes Peak Tree Farms and had an incredible experience.  Even though we live in a city now, I love the idea of chopping down our own tree.  The trees weren't as symmetrical or gorgeous as a store bought tree, but the boys LOVED it!  And the farm owners couldn't have been nicer!

 I sure do like these guys!

Monday, November 12, 2012

Pumpkin French Toast

Our Wi-Fi was down this weekend....so we are starting the week with a recipe!   I will try and get a project post in tomorrow....


My boys could eat french toast EVERY morning if we let them!  I have come up with several variations to make french toast 1. a little better for us and 2. tasty and different.  Here is our fall variation, Pumpkin French Toast!

ingredients:

  • 1 loaf of sliced bread (the better the bread, the better the french toast!  Our favorite is a local bakery's flax seed walnut bread!)
  • 1/2 C pumpkin puree (canned or fresh)
  • 4 eggs (if you use 2 eggs and 2 egg whites, that works too!)
  • 1/3 C milk
  • 1 t pumpkin pie spice
  • topping of choice
directions:

Mix the pumpkin with the eggs, milk and spice.  Preheat a non -stick skillet on medium heat.  Coat a slice of bread with the egg mixture and place in the skillet.  From here, make it like you would regular french toast.  Cook about 4 minutes on each side.  Serve with your choice of toppings (our favorites are syrup, butter & powdered sugar, apples and Greek yogurt, or whipped cream and crushed walnuts).


Thursday, November 8, 2012

Shutterfly

AND, I never got caught up this week....  So, my product love post will be short, sweet and to the point today.  As the title of the post would indicate, Shutterfly is the object of my love today!  Really it is the object of my love most days, if you haven't ever checked it out, you should do so immediately, especially if you have kiddos!  


Now, I know there are about a bazillion photo sites out there, and I have used several of them.  Some of them have better print quality and more options for photo books, but Shutterfly is my favorite site to recommend.   It is ridiculously user friendly, it is free (LOVE that!), requires no purchase to store unlimited photos, and has guaranteed happiness with your purchase.  

I have a picture addiction and Shutterfly satisfies most of my picture needs.  They always run great promotions and they have tons of amazing products!  I love that I can share my photos easily with anyone I choose via email, they also link nicely to facebook and help create amazing share sites.  Everyone should have a Shutterfly account!  

Here is my most recent creation for any that would like to see it...

http://share.shutterfly.com/action/welcome?sid=0QatG7Ju3bsWl6


Tuesday, November 6, 2012

Elephant cards

Happy Tuesday everyone!  I don't know about you, but my Monday was very much a  black hole of time and energy  Monday!  None of our errands went smoothly, our sewing machine (which they called to tell us was fixed) wasn't ready to be picked up (and require about 45 minutes of paperwork and testing!!!), three different stores did not have the basil we were looking for, and the car wash snapped my windshield wiper off....Needless to say, I didn't get as much done as I thought I would, and started my week off behind.  Oh well, there is always tomorrow!  One of my favorite parts about being a stay at home mama is that our schedule is fairly flexible and very adaptable!  We started over today and it is going well (although I am still behind, but really, that is not unusual!).

To explain today's craft I will let you all know that here in our family, we L-O-V-E the zoo!  We have a season pass and go an average of 3 times a month.  My kiddos know several of the animals given names (Mihala the hippo, America the flying fox, Cheyenne the black rhino, Agnes the python, ect.) and have an obscene amount of animal knowledge.  So, when a beloved elephant passed away a few weeks ago, they wanted to do something for her elephant friends.  I suggested we make sympathy cards (none of them had any idea what the heck sympathy was, but I did my best to explain and they were happy to make cards!).  Vince (and Kurt) decided to make a heart elephant similar to the animals found in one of our favorite books, My Heart Is Like A Zoo by:  Michael Hall.  Here is how those turned out

And Damon chose a black elephant die cut that we pasted on a printing/stamping project.


I like that my boys were thoughtful enough to want to make something so Mimi(the deceased elephant)'s friends wouldn't be so sad.  They make me proud sometimes!

Saturday, November 3, 2012

Macaroni & Cheese!

My husband's father came from a family of 8, 7 boys and 1 girl.   Maudy, the matriarch of this family, is quite a lady!  I am sure she has many incredible stories to tell of motherhood and one day I hope to get out to see her in Baltimore and hear them.  She is this tiny, sweet, kind, person who raised all these big guys (I think they are all over 6'1"!) and a wonderful daughter (she was the baby of the family), plus she came up with the beginnings of the recipe I am sharing today.  So here we go with Maudy's Macaroni and Cheese!

This is her original recipe:
2 T butter
2 T flour
1/2 t salt
2 1/2 C milk
2 C cheese, OR 1/3 pound OR 11 slices
8 oz elbow macaroni

Here is our family's version:
1/2 medium yellow onion- chopped small
2 garlic cloves- crushed or fine chopped
3 T butter
3 T flour
1/2 t salt (we use sea salt)
1 1/2 C milk
1 C broth (we use organic vegetable broth) OR skip the broth and add an extra C milk OR 1 C pureed squash (with the squash option I usually add about 1/4 cup more milk for the right consistency)
2 C cheese (we really like to mix this up, our favorites thus far are smoky cheddar and gruyere cheese)
8 oz dry pasta (I let the kiddos pick the shape, they usually go for shells or bowties!)
optional: 1/2 C bread crumbs or panko

Directions:
1.  Preheat oven to 375
2.  Cook pasta as directed on package
3.   Make the cheese sauce

  • Melt butter and add onions.  Cook on medium heat til the onions are transparent.
  • Add the garlic and saute for 20 seconds
  • add the flour and mix
  • slowly add milk and broth/squash 1/2 C at a time allowing mixture to thicken between additions.  Stir frequently
  • Heat until thick
  • Add cheese and stir until blended

4.  Mix cheese sauce with cooked pasta
5. Put macaroni & cheese (okay pasta & cheese!) into a greased baking dish
6.  sprinkle top with panko or breadcrumbs and a little extra cheese if you want
7.  Bake at 375 for 30 minutes

This recipe is not our most healthy, but everyone loves it!  It is a frequent request and the boys always ask for seconds!  And by boys, I mean the three small ones and the big one I am married to!


Friday, November 2, 2012

Our free week!

Vince has the week off school and we have been living it up!  On Monday we headed down to visit my mom for her birthday, Tuesday it was off to the Crazed Cornfield Maze and Colorado Pumpkin Patch, Wednesday the big boys and I headed to Ice Age 4:  Continental Drift, Thursday was a day to clean and go to the library and today (Friday) we got to visit the Downtown Aquarium here in Denver.  In between all the activities we made it to the gym 3 times (more than I have been since hurting my coccyx!), carved jack-o-lanterns, went trick-or-treating and got incredibly dirty playing in our muddy backyard!

Now that Vince is in school all day long, I continually find myself missing him.  I know his brothers miss having him around too.  I hung out with Vincent 1800 out of the first 1825 days of his life.  And now our time together is reduced by 7 hours every day.  I am so, so, So proud of the little man, and so, so, SO excited for his life as a grade-schooler, but there is a small part of me that wants him to be with me forever....I mean, ALL THE TIME forever and ever!  Like I could home-school the kid and turn him into a total and complete mama's boy where I am part of every decision he ever makes and in his life every single day, forever!  I could almost do that, then I remember how much I want to raise an independent, free-thinking, likable, thoughtful member of society and I don't.  It doesn't quite seem fair that I can't have it both ways...

Back to our busy, fun-filled week... I feel the need to take full advantage and enjoy every minute of Vince/3 boy time I can get nowadays and we did just that!  We had a fantastic week and made some amazing memories!  Here are a few photos from my favorite activity, the Crazed Cornfield Maze and Colorado Pumpkin Patch:


P.S.  if you are in the Denver area, this place was incredible!  We had a great time playing in the corn-pit and in the maze (there is also a haunted maze for the braver folks!).  Plus (bonus!)  the pumpkins were a smokin' deal!  We went after the official 'Halloween Weekend' (on October 30th), but we got 6 medium to big pumpkins, plus 7 decorative squash and tiger striped pumpkins for under $11!  I do love a deal!  Here is the link:  http://crazedcornfieldmaze.com/


Tuesday, October 30, 2012

Halloween paintings & haunted gingerbread house

Hello everyone! I love, love, LOVE this time of year!  There are so many great holidays and fall celebrations and it is gorgeous here in Colorado!  I am a little, tiny bit sad that Halloween is this week and my fall festivities are 1/3 over, but still over-the-moon excited to be having a great autumn!


Here are a couple more of our Halloween projects....

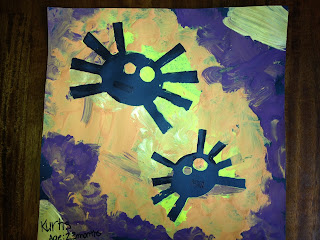
The boys had a BLAST creating these paintings!  We placed cut out shapes on black cardstock (I put a glue dot on the shapes to prevent them from moving around) and the kiddos dotted paint on the paper around the shapes.  When they were finished, I  took the shapes off and this is what was left!  Gorgeous, huh?

Kurtis especially liked this project because he likes to pound the paintbrush into the paper, and that is what he got to do for a full 9 minutes!  Each boy got to pick out their spooky Halloween shape and Damon chose the colors (which turned out pretty great!).  I love how Vince used a sole dot of purple paint to complete his painting!  


And, because it is almost Halloween and I won't share any Halloween projects after Wednesday, here is another of my favorites from this year:
Our Haunted Gingerbread House

This was a kit from Wilton.  We bought ours at Jo-Ann fabric and Crafts.  I like these kits because they are easy and come with everything you need.  Generally the rule is that these houses are not to eat, but Kurtis couldn't help himself!

Damon was actually the one who decorated most of this house.  I was very impressed with his attention to detail and his patience in creating the look he wanted (he wanted his house to look like the one on the box).  He place every piece of candy and frosted the black on the roof and the grey on the door, impressive for a 4 year old!

Hope you enjoyed our Halloween crafts!  Here's to a happy and safe trick-or-treating!!

Saturday, October 27, 2012

Not my best day.

Shucks!  It has only been one week and I am going off my schedule!!!!  Dangit.  Honestly, I am not terribly surprised....  the good news is I got all the posts that I wanted to get done, this is just a bonus! (Yay!)  The bad news is because I am feeling badly this morning and I think writing about it will make me feel better. (Boo!)

My adorable, destructive, no concern for his personal well being daredevilish, sweet, little angel son is sick.  Now, I am not a worrier by nature, my mom takes care of all of that for me, but I think sometimes I go too far in the other direction.  I feel like I tend to be so optimistic that I sometimes lose sight of reality or I ignore things that don't fit into my idea of what 'should' be happening.  This is the WORST when it adversely affects my babies...

Remember last week how I told you that my kiddos were sick?  Well I didn't take them to the doctor because I am not the mom who runs to the doctor every time my kid sneezes.  However, the two small ones had well checks last week and turns out Kurtis has a (pretty intense) double ear infection.  I had mentioned to the pediatrician that I was concerned about K's hearing and speech early in the appointment.  She is now thinking that this poor child has probably had a severe infection for some time and probably has had chronic ear infections.  Meaning, I have neglected my child's health care and now he is suffering because of it.

I know, I know... this is not a HUGE deal and I am making WAY more out of it than I should.  And to be fair, this kid has the world's highest pain tolerance (he doesn't even flinch when they do finger sticks and makes one shout out when he gets a shot).  Really my only clues to the infections are his hearing, speech and cold, but still!  I am not feeling like the world's greatest mom right now.  The two year old is waking up every  5 hours or so and asking for ear drops.... My kid, who doesn't sit still for ANYTHING, will bring me his ear drops, lay his head on my lap and say please over and over.  It is heartbreaking.

It reminds me of the time I thought my other son's giant cavity was a piece of food and I dug a toothpick in there day after day trying to get it out.  The expression on the dentists face when I told him what I had done was pure horror.  Not winning mother of the year here...


Sweet Potato Chili...YUMMY!!

I flippin' LOVE my slow cooker!  How wonderful is it that dinner can be prepared ahead of time and is ready, hot and delicious right at 5:00!?  Now that my oldest is in kindergarten I feel a whirlwind of activities every single day after school.  Pick up the kid, come home (or go to some practice or lesson), make dinner, do homework, baths, books and bed.  My entire afternoon is shot!  But with my amazing slow cooker, the 'make dinner' step is reduced to a 'serve dinner' step.  Not having to prepare dinner = more fun time with my kiddos!  LOVE IT!


So for my first recipe here on this blog I am introducing you to one of our favorite slow cooker choices, Sweet Potato and Black Bean Chili!!  And by 'our' favorite, I mean the boys and mine... John does NOT like sweet potatoes (weirdo!).  He does like the chili, but picks out the sweet potatoes. He says the meal is too labor intensive for him, but hey, it is much less labor intensive for me so it stays on our menu.  The man could use a little hardship in his life!

Here is what you will need:

~2 medium sweet potatoes-scrubbed and diced (you can peel them if that's your thing)
~1 onion-diced (I use yellow)
~1 red bell pepper-seeded and diced
~1 14 oz. can (organic) fire roasted tomatoes
~1 can (organic) black beans
~2 cups (organic) veggie broth
~1.5 tablespoons minced garlic (about 4 cloves)
~1 tablespoon chili powder
~1 teaspoon cumin
~1 teaspoon paprika
~cayenne & salt to taste (we use about 1/2 teaspoon of each)
~optional:  ground turkey, italian mild sausage, andouille or chorizo (we have used them all and they are all good)
~optional #2:  crushed corn chips, cheese or lime juice to serve on top!

Combine all ingredients(except option#2) in a slow cooker and cook for 6-8 hours on low!  Done!

My friend Kristin found the beginnings of this recipe for me, but we have since added and adjusted to fit our family.  Damon loves helping make it and it always turns out well!  Hope you love it too!

Thursday, October 25, 2012

My kid needs some fat!

Today is a day for things I love/things I am interested in!!  Hooray!  (P.S.  this picture has nothing to do with anything... I just had to have a picture to liven up this semi-boring post!)

For this post I will be talking about an interest...Health and Nutrition (I am a HUGE science nerd!).  Specifically how much fat children need and what those fats should look like. Yay!  Aren't we all so excited!??!

I chose this particular topic as a preface to tomorrow's first Family Friendly Recipe blog post.  I want to begin to set the stage on what our meaning of "family friendly recipes" consists of.  I will go more into this as time goes on, but for today's purposes we will begin with the fact that what makes a healthy diet in an adult is not the same thing as what makes a healthy diet for a growing child.  There are several factors to determine "healthy" for each individual and I am not going into all of that, but I will dive into some very general nutritional guidelines for developing children.

Onto the fat!  Basically children(and adults) NEED fat in their diets, but the types of fat and amounts of fat are very important to consider.  Fat and cholesterol play very important roles in developing brains and nervous systems.  It is recommended that children under 2 get between 30%-35% of their calories from fat.  Children aged 3-12 should be eating a diet where between 25%-35% of their calories come from fat.  Now these numbers are generalizations for healthy brain growth and you should ALWAYS talk to a medical professional before making any drastic changes in anyone's diet, but for most children this is what we should be aiming for.  And this means that approx. 1/3 of all the food our kiddos eat should have fats in them.  Adults often associate healthy eating with vegetables, fruits and very low fat foods, but it is important to remember that kiddos have different needs.  Their little bodies and minds are still growing at a rapid pace and they need fuel to make sure they develop correctly.

So now that I have mentioned how much fat children need, let's talk about what kinds of fats they should be getting.  There are literally hundreds of sources and site to help you figure out what fats are good and what kinds you should be eating.  I will link to a couple of my favorites at the end of this post, but to sum up what they all say, people should be eating mostly unsaturated fats (this includes monosaturated  polysaturated and omega- 3 fatty acids), few unsaturated fats, and hardly any trans-fats (this includes 'partially hydrogenated oils).  Examples of unsaturated fats are soybeans, olive and peanut oils, fish, avocados  and tree nuts.  Most saturated fats are from animal products:  cheese, milk (not including skim or non-fat), butter, ect.  There also saturated fats in coconut and palm oils.  Then there are trans-fats...it is recommended that less than 1% of your diet contain trans-fats.  This includes margarine and fried foods.

So there is my little monologue on fat.  Feel free to let me know if you have any questions (I tried not to make it too long and boring, and kept it general....).  Here are some sites if you are interested!

http://kidshealth.org/parent/growth/feeding/fat.html#

http://www.healthychildren.org/English/healthy-living/nutrition/pages/What-About-Fat-And-Cholesterol.aspx?nfstatus=401&nftoken=00000000-0000-0000-0000-000000000000&nfstatusdescription=ERROR%3a+No+local+token&nfs


Monday, October 22, 2012

Jack Skellington Apples

And here it is!  My first official "project post"!

We do several projects throughout the week, but this week I am going to share Vince's favorite.  Our skeleton caramel apples!  Vince is the snack person at school this week (and that is a HUGE deal :)!) and when I asked him what he wanted to bring he requested these way more labor intensive than bags of goldfish fun and delicious apples we made for a birthday party last year.  Here is what they look like:


And here is how we made them...
Supplies:
5 clean, preferably organic, medium sized apples
1 bag of caramel bits (you can use caramel squares, but you have to unwrap those!)
1 bag of white melting chips (we used girahdelli)
1 container of black icing or bag of black melting chips
5 sticks
roll of parchment of wax paper
optional:
5 treat bags (I just use foldover sandwich bags because they are cheap)
ribbon
gift tags

Directions:

1.  Jam the sticks into the tops of the apples.  Make sure they are secure.  (My 5 year old LOVED doing this!)

2.  Melt the caramel accoding to the directions on the package  (make sure to melt the caramel in something that is bigger than the apples)

3.  holding the sticks, dunk the apples into the melted caramel until completely covered.  Place the caramel covered apple on the wax or parchment paper to cool.

4.  After the apples are completely cool (about 4 hours) begin melting the white chips according to package directions.

5.  Dip the carameled apples into the white candy melt.  Place on a separate sheet of wax or parchment paper to cool.

6.  Once the apples are completely cooled and hardened (we left ours overnight), decorate with the black icing or candy melts.  This is a step I did minus kiddos because I am a little too particular...

7.  Let the icing harden and either wrap in treat bags (like we did, with plastic spider rings to top them off), or cut them up and enjoy!  If you have no fear of mess, let the kids eat them off the stick.  My 2 year old, thought that was AMAZING!  He was a sticky, hot mess afterward though!

So there is our project for the week.  The faces I did were inspired by Jack Skellington from The Nightmare Before Christmas.  The boys had fun and they turned out pretty well.  Not perfect, but not too bad either!


Sunday, October 21, 2012

Changing it up!

Between a broken tail bone and my entire family coming down with the cold that won't go away, I didn't get this blog off to the start that I envisioned...

I did think about it a lot though!  Does that count?   The conclusion I came up with is that I actually DO want some structure to the blog... So how does this sound?

I would like to post approximately 3 times a week.  The first post will be a project that the boys and I have done, the second will be a post on a product I love or a mothering issue I am dealing with/thinking about,  and the third will be a family/healthy recipe of some sort.  

Things will still be fairly general and contain glimpses into our day to day life for my own, very selfish reasons.  But I so love being a stay at home mom and I would love to inspire and encourage other moms with my posts.  I want to support all my friends (which, if you are reading this, you are my friend!) in their efforts to be the best mom they can be!  

That's all for tonight, but look for the "project post" coming tomorrow!

Emily

Thursday, October 11, 2012

What I feed my sick boys

The last few days we have been reading lots of books and watching more T.V. than usual.  My two small boys are sick :(.  As hard as it is to see my babies not feeling well, I am taking full advantage of the endless supply of snuggles the boy are offering and enjoying the time at home (while getting absolutely NOTHING accomplished, oh well!).

One of the challenges I have when my children are sick is getting nourishment into their tiny bodies.  I know it is hard to eat when you don't feel good, but I also know that their little bodies are working hard to fight whatever infection they have.  So I try to get as many good things into them as I can.

None of my boys will eat soup.  I have had them help make both stone soup and chicken noodle soup thinking that they would like it if they helped prepare it.  No luck.  Damon and Kurtis will eat the solid parts off a plate, but no broth (and this only happens when they are healthy, not when they are sick).  And Vince (not surprisingly) won't touch any part of it.

So soup is out.  Smoothies and juice are my best options.  Vince and Damon both like the kale, orange, apple, carrot juice blend at the Whole Foods Juice Bar, which is fantastic if I can make to a Whole Foods (man I wish I had a juicer! Or a husband that would go to a grocery store...).  These amazing little products are a favorite of mine and the boys' http://www.buddyfruits.com/BuddyFruitsProducts.php.  These are convenient  easy to store and eat, as well as super delicious.  The coconut milk & fruit blend and the pure blended fruit are our favorites and I never feel bad about letting my kids eat these!  Goldfish, saltines, rice cakes and bananas are other snacks that usually go down pretty easily and give a little more energy to the boys.

Vitamin Water, Coconut water and Pedialyte are my favorite choices to keep them hydrated.  Although I recommend steering clear of colored options whenever children are vomiting.  Nothing worse than your clothes, their clothes, the carpet, furniture and bedding being stained with throw-up!

I am starting to hear the boys wake up from the most recent nap, so I am going to wrap it up.  These are a few of the things that work in my family.  Anyone else have anything that helps their sick kiddos?  I would love to hear about it!

Sunday, October 7, 2012

Okay, I'm doing it!

Here it is!  My very first ever blog post.....

Where to start.... hmmmmm...  I guess I will start by saying thank you to all of you who have requested and supported this blog.  And then apologize for it taking so long to come to fruition...

I am writing with the purpose of documenting our lives here in the Albright family.  I have no real agenda and the concept is still a work in progress, but I figure I have to start somewhere.  Thanks for being part of the chaos while this process unfolds itself!  As time goes on I may feel the need to describe myself and my family, but for now I do not.  I figure that most people who will read this are already intimately aware of who we are, so I am skipping any unnecessary introductions.

On to the aforementioned documentation:

This weekend the boys and I spent some time creating haunted houses.  We first painted the background, let it dry, and then glued on pre-cut construction paper cutouts.  The boys LOVED this project!  One, because they got to paint (read, make a mess!) and two, because it involved Halloween!  They are SO looking forward to Halloween!  As a side note, I will say that I have (quite purposefully) created holiday enthusiasts!  We adore fall and the upcoming festivities, which you should see lots of right here!  
Back to  the project.... I love crafting and want to encourage a love of art and crafting with my children (even though, and especially because, they are boys).  I try to come up with things they can do with little help from me (the goal is only having me demonstrate), but still look incredible when we are finished.  Even small children can tell when they create something beautiful and are very proud of the accomplishment!  (Darn, I feel like I am sounding a little preachy, not my intention, just want to let everyone know where I am coming from!) So, yes, I did demonstrate our project, and I also used my Silhouette Cameo to cut the shapes of the trees, fence, ghosts and bats, but the placement, painting and gluing was done by the boys! (I did help Kurtis with his moon painting and window placement)  They turned out amazingly well!


Happy October everyone!  And welcome to the craziness that is my life with three incredible boys!